I came across this post on the Arduino forums the other day, so, naturally, i thought i would give it a go.
I found an old 35mm camera lying around at home, and thought I could put it to good use. After about half an hour of trying to find the blooming screws and get it open, I managed to get to the flash circuitry. It was quite simple really, it came out as one small circuit board with a few wires hanging out - two of them obviously for the power, and one to fire the flash. As it turned out, touching this third wire to the positive side of the battery made the flash fire. This is quite easy to do by simply using a transistor.
Here is the complete schematic:
By putting the base of the NPN transistor at 5V relative to its emitter, the purple (flash trigger) wire 'goes high' causing the flash to fire. This is accomplished with the following quick code:
# variable declarations
int buttonIn = 0;
int wait = 0;
# pins
int flashPin = 12;
int switchPin = 7;
int delayPin = 0;
void setup(){
pinMode(flashPin, OUTPUT);
pinMode(switchPin, INPUT);
pinMode(delayPin, INPUT);
Serial.begin(9600);
}
void loop(){
buttonIn = digitalRead(switchPin);
if (buttonIn == 1){
delay(wait);
flash();
Serial.println("Picture Taken");
Serial.println("Recharging Capacitor");
delay(2000);
Serial.println("Capacitor Recharged");
delay(500);
}
wait = analogRead(delayPin);
Serial.println(wait, DEC);
}
#fire the flash
void flash(){
digitalWrite(flashPin, HIGH);
delay(100);
digitalWrite(flashPin, LOW);
}
As you may have noticed, from the schematic and the code, i have added a potentiometer into the circuit so i could delay the flash's firing to allow the splashes and whatnot to develop.
Here's the 'equipment' relating to the above schematic:
The contact switch I made using 2 CD's and a micro-switch from an old video player.
To take the pictures, all you have to do is:
- Set your camera to a low ISO sensitivity (ISO100) and a slow shutter speed (4")
- Get the camera focused on the switch (or whatever you've sat on it)
- Turn out the lights
- Press the camera's trigger
- Drop the object, whatever it is, onto the contact switch before the shutter closes making sure the switch closes.

A 'rich tea' biscuit breaking as it hits the
ice-cream tub lid covering the contact sensor

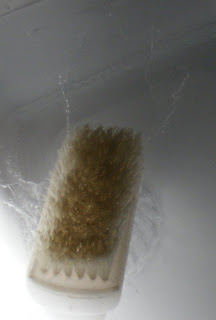
A small scrubbing brush being dropped in a tub of water

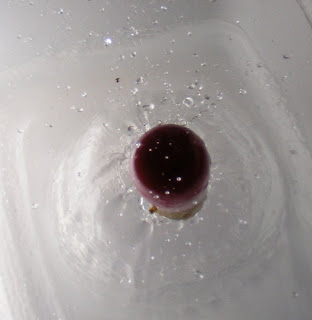
A coloured bulb just hitting the water

Another coloured bulb hitting the water at a diagonal

A really nice splash as the bulb hits the water
Improvements:
As mentioned in the link at the top of the post, a microphone would be an excellent way of doing this, so if anyone has any pointers...
I could also try doing it with a laser, there's an idea.
Any comments/suggestions greatly appreciated.
Chris
As mentioned in the link at the top of the post, a microphone would be an excellent way of doing this, so if anyone has any pointers...
I could also try doing it with a laser, there's an idea.
Any comments/suggestions greatly appreciated.
Chris


